Step-by-Step Instructions: Breaking Down a Whole, Pasture Raised Chicken & Nourishing Bone Broth
- gmicrofarm

- Sep 15, 2025
- 3 min read
Updated: Feb 3
Steps to Disassemble a Whole Chicken
What You'll Need:
A sharp chef’s knife or sturdy kitchen shears
A large cutting board (one that won’t slip)
Paper towels for blotting moisture
Step One: Prep the Chicken
Place the chicken breast-side up on your cutting board. Remove any giblets or the neck from inside the cavity. Pat the chicken completely dry with paper towels to prevent slipping and to cut through the skin easier.

Step Two: Remove the Legs
Hold one leg away from the body and slice through the skin where the thigh connects to the breast. Bend the leg back until the joint pops out of its socket, then cut cleanly through the joint. Repeat on the other side. You should now have two whole legs with thighs attached.


Step Three: Separate Thighs and Drumsticks
Place one leg skin-side down. Feel for the natural line of fat running between the drumstick and the thigh as that’s where the joint is. Cut straight through the joint to separate. Do the same with the other leg.


Step Four: Remove the Wings
Pull one wing outward. Slice through the skin where the wing meets the breast, then cut through the joint to detach it. Repeat on the other side. You can leave the wing tips attached or trim them off to save for bone broth.


Step Five: Remove the Back
Turn the chicken breast-side down. Using kitchen shears or your knife, cut along one side of the backbone from tail to neck. Repeat on the other side and lift out the backbone completely and save for bone broth. What remains is the breast portion.


Step Six: Split the Breasts
Turn the breast section skin-side down. Use firm pressure with your knife to cut straight through the breastbone, separating the breasts into two even halves.


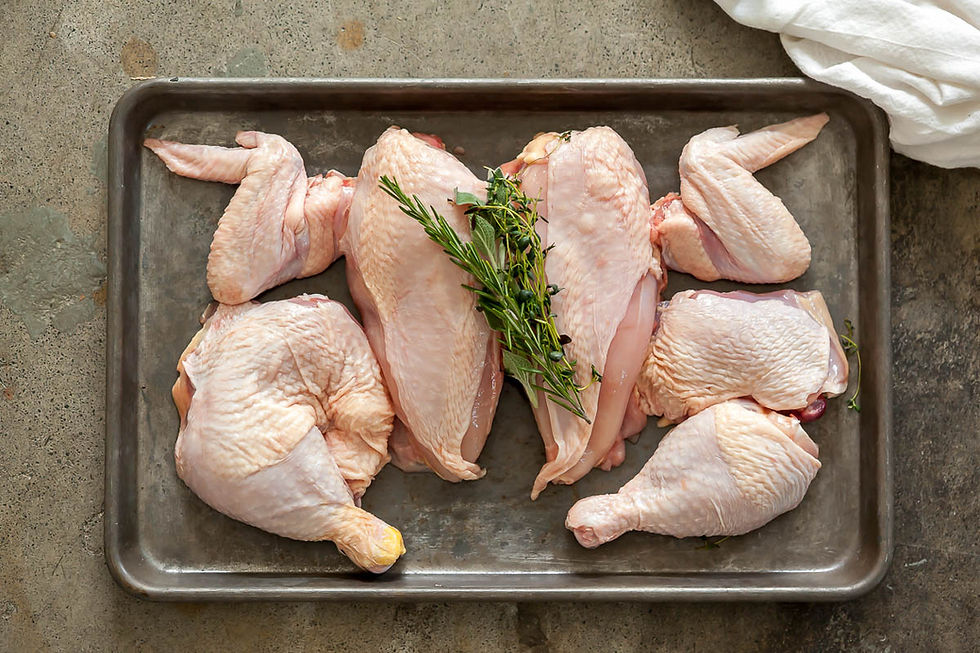
The Final Product
2 whole breasts
2 thighs
2 drumsticks
2 wings
1 backbone (for bone broth)
Geraghty's Market | Chicken Bone Broth


Proudly partnering with Valerie Skinner Chef, Copywriter & Recipe Developer of Thyme & Joy
Ingredients (for one whole chicken carcass & backbone)
FREE recipe card download available here.
Bones from 1 whole chicken (including the backbone, wing tips if you have them)
2 medium carrots, cut into chunks
2 celery stalks, cut into chunks
1 large onion, quartered (skin on is fine)
3 garlic cloves, smashed (optional)
1 tablespoon olive oil
2 teaspoons salt
1 teaspoon black peppercorns
Any herbs you enjoy (rosemary, sage, thyme)
8–10 cups water (enough to fully cover bones and vegetables)

Stovetop Instructions:
Preheat oven to 425°F. Place bones, carrots, celery, and onion on a sheet pan. Drizzle with olive oil, sprinkle with salt and pepper, and roast for 25–30 minutes until golden brown. Transfer everything to a large stockpot. Add garlic, peppercorns, bay leaves, and water. Bring to a boil, then reduce to a gentle simmer. Skim any foam from the top and cook uncovered for 6–8 hours, adding water if needed to keep bones covered. Strain, cool, and store.
Slow Cooker Instructions:
Roast bones and vegetables as above. Transfer to a slow cooker, add remaining ingredients and water (8–10 cups). Cook on Low for 12–18 hours. Strain and store.
Instant Pot Instructions:
Roast bones and vegetables as above. Transfer to the Instant Pot. Add garlic, peppercorns, bay leaves, and water (up to the max fill line). Lock the lid and cook on High Pressure for 2 hours. Allow natural release. Strain and store.
Storage Instructions:
Once strained, let the broth cool completely. Store in airtight containers in the refrigerator for up to 5 days. For longer storage, freeze in quart containers or in ice cube trays. Broth will keep in the freezer for up to 3 months. A layer of fat may rise to the top once chilled; you can leave it as a natural seal or skim it off before reheating.
Ways to Use Bone Broth:
Sip it warm in a mug with a pinch of sea salt.
Use as a base for soups and stews.
Cook grains like rice or quinoa in broth instead of water.
Add to sauces or gravies.
Freeze in small portions to use when sautéing vegetables or deglazing pans.
Happy Cooking!
The Geraghty's


Comments